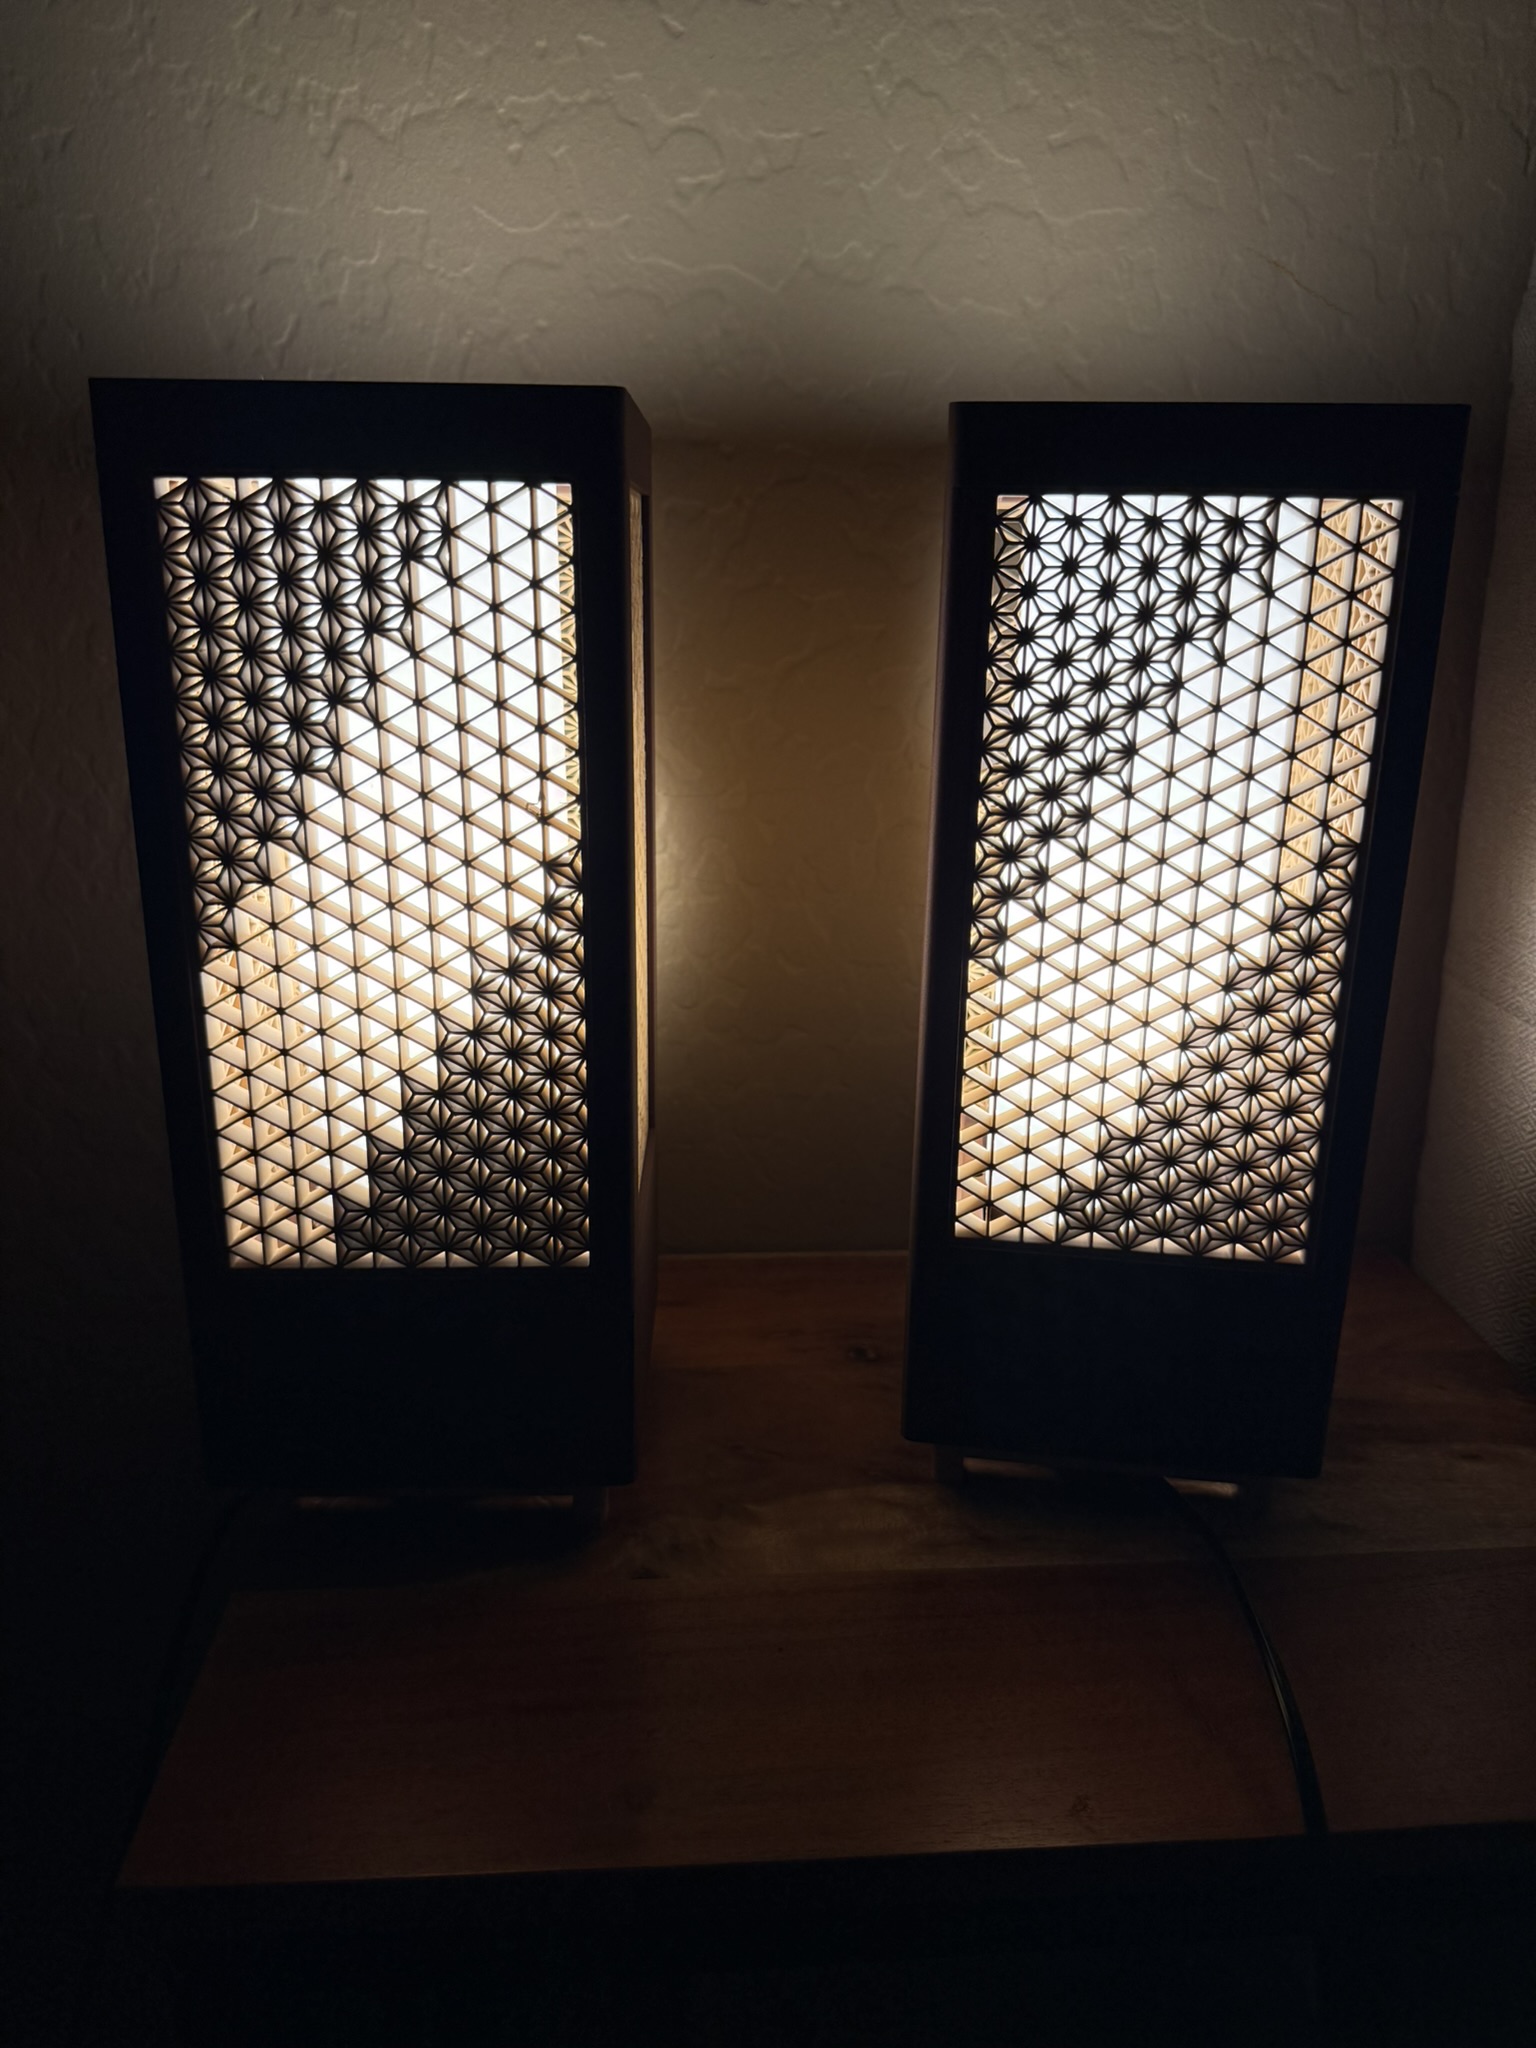
Blogs
Final Result

Party mode
Background
Kumiko is a very old Japanese woodworking technique that began around the 8th century. It is composed of geometric shapes that can make for some pretty cool designs. I am 3d printing them here because firstly it's pretty easy and secondly because real Kumiko builds cost way more than I'd typically ever want to pay for, which is understandable why it's so expensive given the intricate patterns and the labor it would take to produce.
The model I used: https://makerworld.com/en/models/1358686-customizable-kumiko-lantern-lamp-by-foxwood#profileId-1402877
Materials
Filaments
Parts
- E27 Socket (standard lightbulb socket)
- BT3 Button Head Cap Self Tapping Screw (BHCS)
- Phillips HUE A19 light bulb
| Item | Cost |
|---|---|
| PLA Rosewood filament | $24.99 |
| PLA Matte Latte Brown | $12.99 |
| PLA Matte Ivory White | $12.99 |
| E27 Socket | $3.42 |
| BT3 Button Head Cap Self Tapping Screw (BHCS) | $1.07 |
| Phillips Hue Bulb 2 pack | $71.99 |
| Total | $127.45 |
| Total without bulbs | $55.46 |
Probably not necessary to go with the rosewood filament. I just liked the color more, so I went with that. You can also use whatever lightbulbs, but I like the hue ones for my automations that I have set up, and for the fact that it uses Zigbee.
Also the bulbs I have are E26, but the socket mentions its compatible with both ¯\_(ツ)_/¯
The Build
The Parts
*Ashanoa (the three pronged inserts) count is not accurate in photo

The Walls
You can basically design any pattern you want. There’s this website https://www.kumikodesigner.com/ that will generate patterns for you, but in my case, I'm just going to use the one that's already in the 3d print, as well as using the same angled design.
The amount of triangles that are in each wall are 35 (height) x 10 (length)
If you want to do the same angled pattern, either start on the 15th triangle down or the 21st up, and then go down in a staircase subtracting 3 triangles down each time in a staircase until you place 3 (or 7 across).

You will need 672 Ashanoas in total (84 for every diagonal)
I didn't count them I just did
>>> from functools import reduce
>>> reduce(lambda a,b: a + (b*3), range(1,8),0)
84
>>> _ * 2 * 4 # _ <- means to use last result, which in this case is 84
672
Because I am lazy. There is probably a more elegant way of figuring that out, but I'm only going to be doing that calculation once.
Once you have one wall panel complete, it's pretty easy to complete another one just by laying it on top of it and copying the layout.

⚠️ Warning: Once you create two of an identical panel, you will need to create 2 more that have the diagonals on the opposite side. They will not be the same when rotated.

The Frame
The rest is pretty straightforward, so it will mostly just be pictures here.
Put the socket in the large block, and make sure to screw on the overhang piece. Then connect four screws to the main frame from the top into the block.

Make sure when screwing in, that it becomes flush with the block. Might seem like it won't be able to, but eventually it will.
Once that is complete, I flip the lamp over and attach the stand.

There are four more screws to screw in here. same deal as before with making sure it is flush. I believe this is also where the four pegs go in as well, but I didn't want to do that here so I did not insert them. If only because I like the look of this better

Once that is done, all that's really left is to put in the light bulb, the shade, and the walls in and screw the top.
As a note , the shade is just fit in loosely and can be taken out and put back really easily.

Screw in the four corners of the top (this might require a bit more work than the other ones), and tada!

You got yourself a pretty cool lamp

A picture of my cat for the road.
Kumiko Lamp Build Log
Windows is what I typically just use for gaming and some general stuff, only one of my computers actually runs windows, definitely recommend setting up WSL for it
WSL
Since I run NixOS I use https://github.com/nix-community/NixOS-WSL
Following which I setup an SSH key and clone this repo (my nix config)
git clone git@github.com:rft/nix-config.git
git will likely be missing from a fresh NixOS install, you can add git temporarily with nix quite easily with nix shell nixpkgs#git
after it has been cloned I run sudo nixos-rebuild switch --flake .#mistletoe
"mistletoe" being what I defined my WSL host as.
Windows Software
Software list
- Powershell
- Everything
- windirstat
- Executor
- Blackblaze
- Prism Launcher
- wootility
- Air screen mirroring
- Bambu Studio
- Naps2
- Raindrops
- Autohotkey
- mpv.net
- lossless cut
Powershell
If you want to keep your sanity on windows use powershell, makes you feel more at home if you are used to bash, no longer will you type "ls" and be rejected by windows for not typing "dir" instead
In some ways it's actually better than bash, since it lets you move objects down the pipeline, but given the option I am usually in WSL instead, still though it's not too bad, and becomes really nice with the extensions listed later below.
Powershell is usually installed by default, but with whatever version on windows it can be quite old, so I would suggest you get the latest elsewhere. It should be available via winget or on the appstore
winget install -e --id Microsoft.PowerShell
Everything
Executor
- Might be marked as a virus (allow through defender)
- make sure to mark launch on startup
- Change keybind to win + alt + A
Quick install via winget
winget install --id=Obsidian.Obsidian -e
winget install --id=Valve.Steam -e
winget install --id=Discord.Discord -e
winget install --id=Spotify.Spotify -e
winget install --id=Flameshot.Flameshot -e
winget install --id=WerWolv.ImHex -e
winget install --id=calibre.calibre -e
winget install --id=SolveSpace.SolveSpace -e
winget install --id=Cockos.REAPER -e
winget install --id=Audacity.Audacity -e
winget install --id=Cyanfish.NAPS2 -e
winget install --id=AutoHotkey.AutoHotkey -e
winget install --id=RustemMussabekov.Raindrop -e
winget install --id=BlenderFoundation.Blender -e
winget install --id=OpenStenoProject.Plover -e
winget install --id=Anki.Anki -e
winget install --id=WinDirStat.WinDirStat -e
winget install --id=voidtools.Everything -e
winget install --id=PrismLauncher.PrismLauncher -e
winget install --id=WiresharkFoundation.Wireshark -e
winget install --id=OBSProject.OBSStudio -e
winget install --id=ajeetdsouza.zoxide -e
winget install --id=DebaucheeOpenSourceGroup.Barrier -e
winget install --id=Bitwarden.Bitwarden -e
winget install --id=Microsoft.VisualStudioCode -e
winget install --id=MartinBresson.Executor -e
winget install --id=Bambulab.Bambustudio -e
winget install --id=Ablaze.Floorp -e
winget install --id=Vivaldi.Vivaldi -e
winget install --id=VideoLAN.VLC -e
winget install --id=mpv.net -e
winget install --id=BurntSushi.ripgrep.GNU -e
winget install --id=sharkdp.fd -e
winget install --id=ch.LosslessCut -e
winget install --id=RevoUninstaller.RevoUninstaller -e
winget install --id=Rufus.Rufus -e
winget install -e --id Microsoft.Sysinternals.ProcessExplorer
App Store
There are a few things I get from the Appstore, mainly for convenience
- Oh my posh
- Powertoys
- Icloud
- Wolfram Alpha
- Devtoys
Settings
Disable suggest snap when snapping window to side
- System > Multitasking
- Click dropdown arrow and uncheck "When I snap a window, suggest what I can snap next to it"
Disable "ads"
- Personalization > Lockscreen
- Uncheck "Get fun facts, tips, tricks and more on your lock screen"
- Personalize your lock screen > picture
Enable Hibernation
- Open the old control panel (Might need to search)
- Power Options > Choose what the power buttons do > Check hibernation
System > Multitasking
- Click dropdown arrow and uncheck "When I snap a window, suggest what I can snap next to it"
Terminal
- Psreadline
- Zoxide
- oh my posh
- alias pwsh=“/mnt/c/Program\ Files/Powershell/7/pwsh.exe”
- alias vi=nvim
- alias vim=nvim
- alias cd=z
⚠️ **Warning**: Make sure powershell version is > 6 `$PSVersionTable.PSVersion` to check
Hide other stuff from terminal
Profiles > Azure/Command promt, > Hide porfile form dropdown
Oh My Posh
A bit of software that makes your terminal look nice

winget install JanDeDobbeleer.OhMyPosh --source winget --scope user --force
or get it on the windows app store
https://ohmyposh.dev/docs/installation/windows
Add required stuff to path
If you downloaded via the app store you do not need to follow these steps
- search environment variables on windows search and click on
edit environment variables for account - from there click on
Environment Variables... - from there click on
PATHand addC:\Users\<youruser>\AppData\Local\Programs\oh-my-posh\bin\ - for themes create a new variable called
POSH_THEMES_PATHand addC:\Users\<youruser>\AppData\Local\Programs\oh-my-posh\themes\
Create powershell profile
if using a newer version of powershell it will ask if you want a profile made.
if you do run notepad $PROFILE
if it fails (likely means your powershell version is old) you can run
if (!(Test-Path -Path $PROFILE)) { New-Item -ItemType File -Path $PROFILE -Force }
but I would recommend you update instead!
Add required software
https://github.com/PowerShell/PSReadLine
From an elevated terminal run
Install-Module -Name PowerShellGet -Force; exit
Install-Module PSReadLine -Repository PSGallery -Scope CurrentUser -AllowPrerelease -Force
https://github.com/devblackops/Terminal-Icons
Install-Module -Name Terminal-Icons -Repository PSGallery
View profile
notepad $PROFILE
oh-my-posh init pwsh --config "$env:POSH_THEMES_PATH\powerlevel10k_rainbow.omp.json" | Invoke-Expression
Import-Module -Name Terminal-Icons
Import-Module -Name PSReadLine
Set-PSReadLineOption -PredictionSource History
Set-PSReadLineOption -PredictionViewStyle listView
Set-PSReadLineOption -EditMode Windows
Invoke-Expression (& {
$hook = if ($PSVersionTable.PSVersion.Major -lt 6) { 'prompt' } else { "pwd" }
(zoxide init --hook $hook powershell | Out-String)
})
Starting directory
%USERPROFILE%
Windows Setup