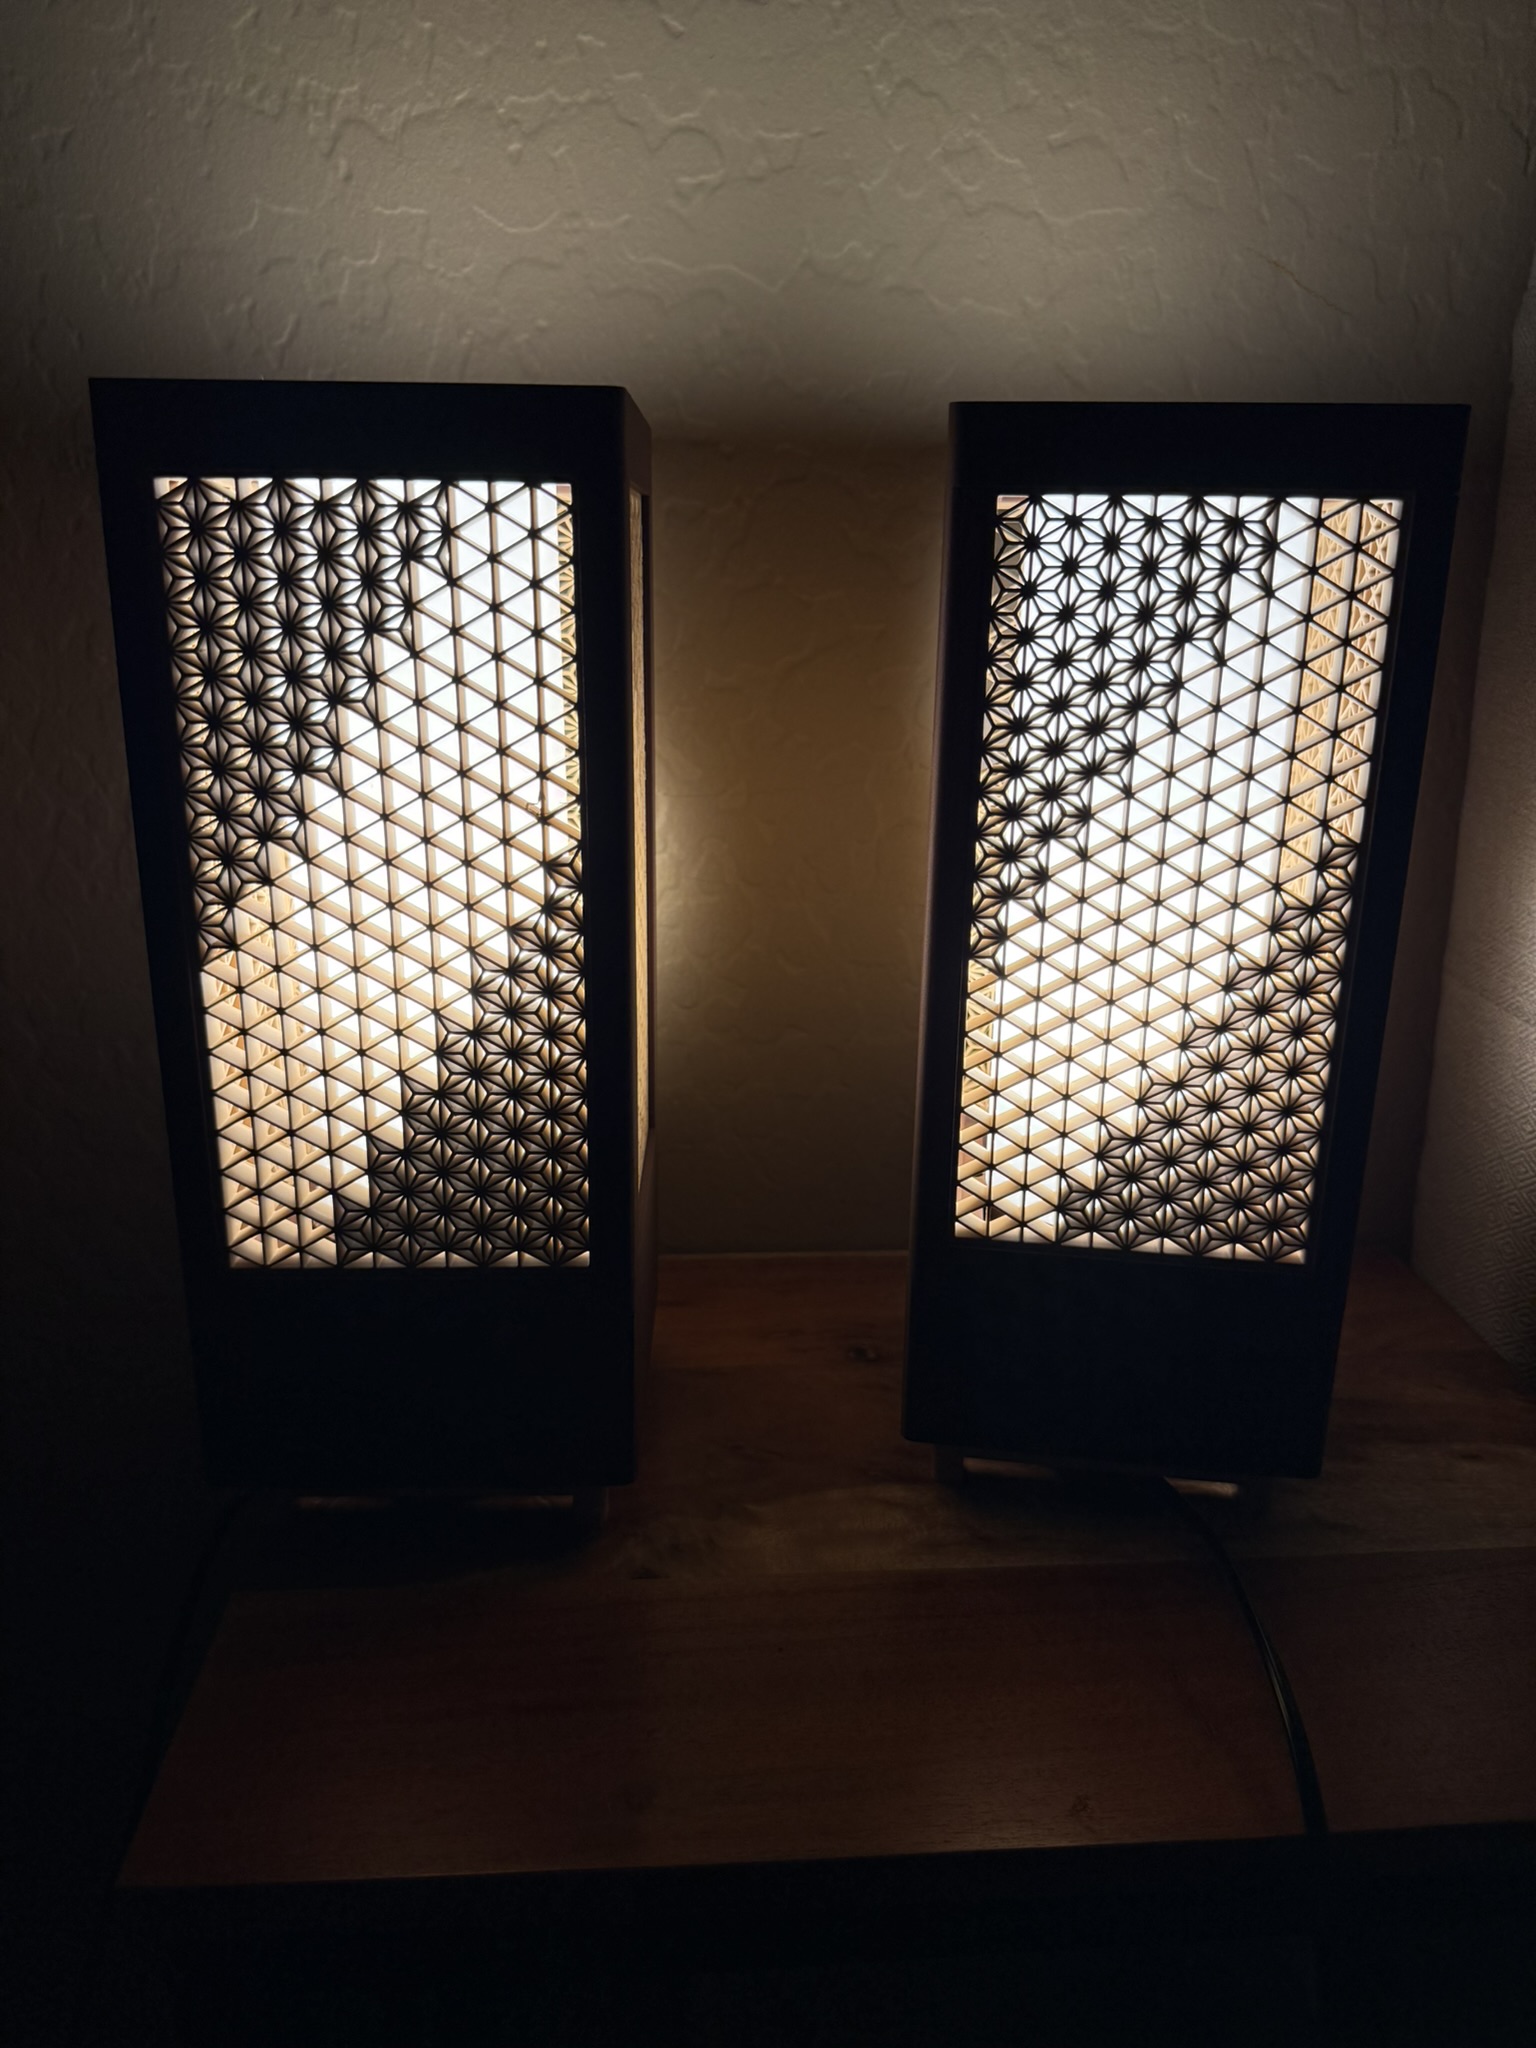
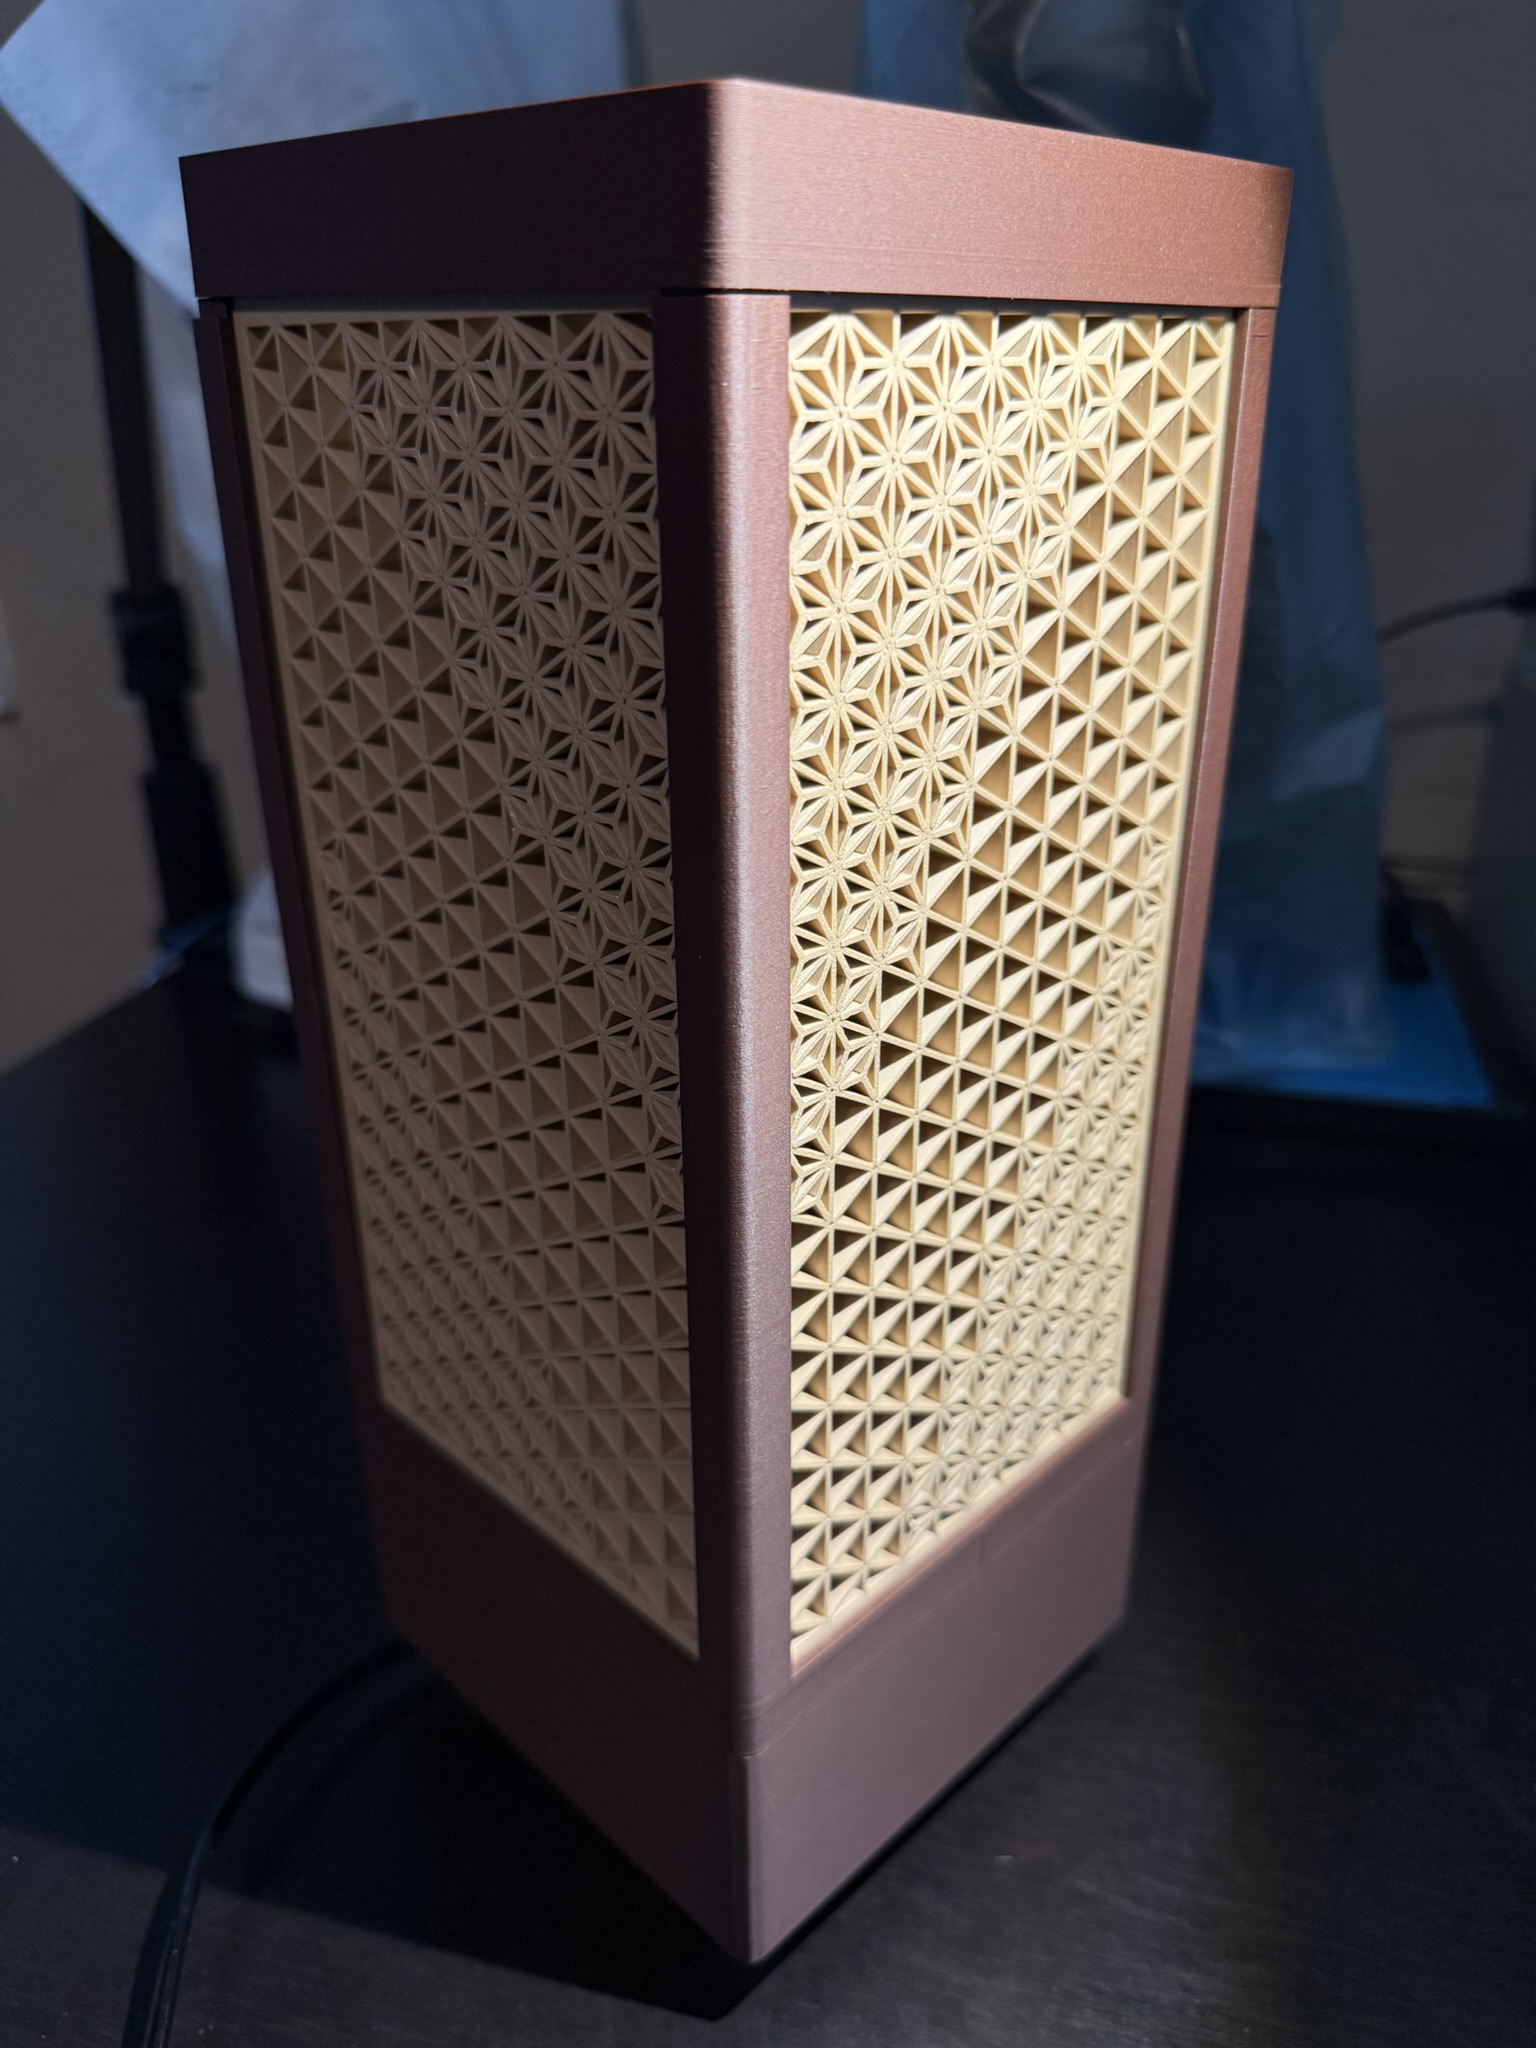
Final Result
Party mode
Background
Kumiko is a very old Japanese woodworking technique that began around the 8th century. It is composed of geometric shapes that can make for some pretty cool designs. I am 3d printing them here because firstly it's pretty easy and secondly because real Kumiko builds cost way more than I'd typically ever want to pay for, which is understandable why it's so expensive given the intricate patterns and the labor it would take to produce.
The model I used: https://makerworld.com/en/models/1358686-customizable-kumiko-lantern-lamp-by-foxwood#profileId-1402877
Materials
Filaments
Parts
- E27 Socket (standard lightbulb socket)
- BT3 Button Head Cap Self Tapping Screw (BHCS)
- Phillips HUE A19 light bulb
| Item | Cost |
|---|---|
| PLA Rosewood filament | $24.99 |
| PLA Matte Latte Brown | $12.99 |
| PLA Matte Ivory White | $12.99 |
| E27 Socket | $3.42 |
| BT3 Button Head Cap Self Tapping Screw (BHCS) | $1.07 |
| Phillips Hue Bulb 2 pack | $71.99 |
| Total | $127.45 |
| Total without bulbs | $55.46 |
Probably not necessary to go with the rosewood filament. I just liked the color more, so I went with that. You can also use whatever lightbulbs, but I like the hue ones for my automations that I have set up, and for the fact that it uses Zigbee.
Also the bulbs I have are E26, but the socket mentions its compatible with both ¯\_(ツ)_/¯
The Build
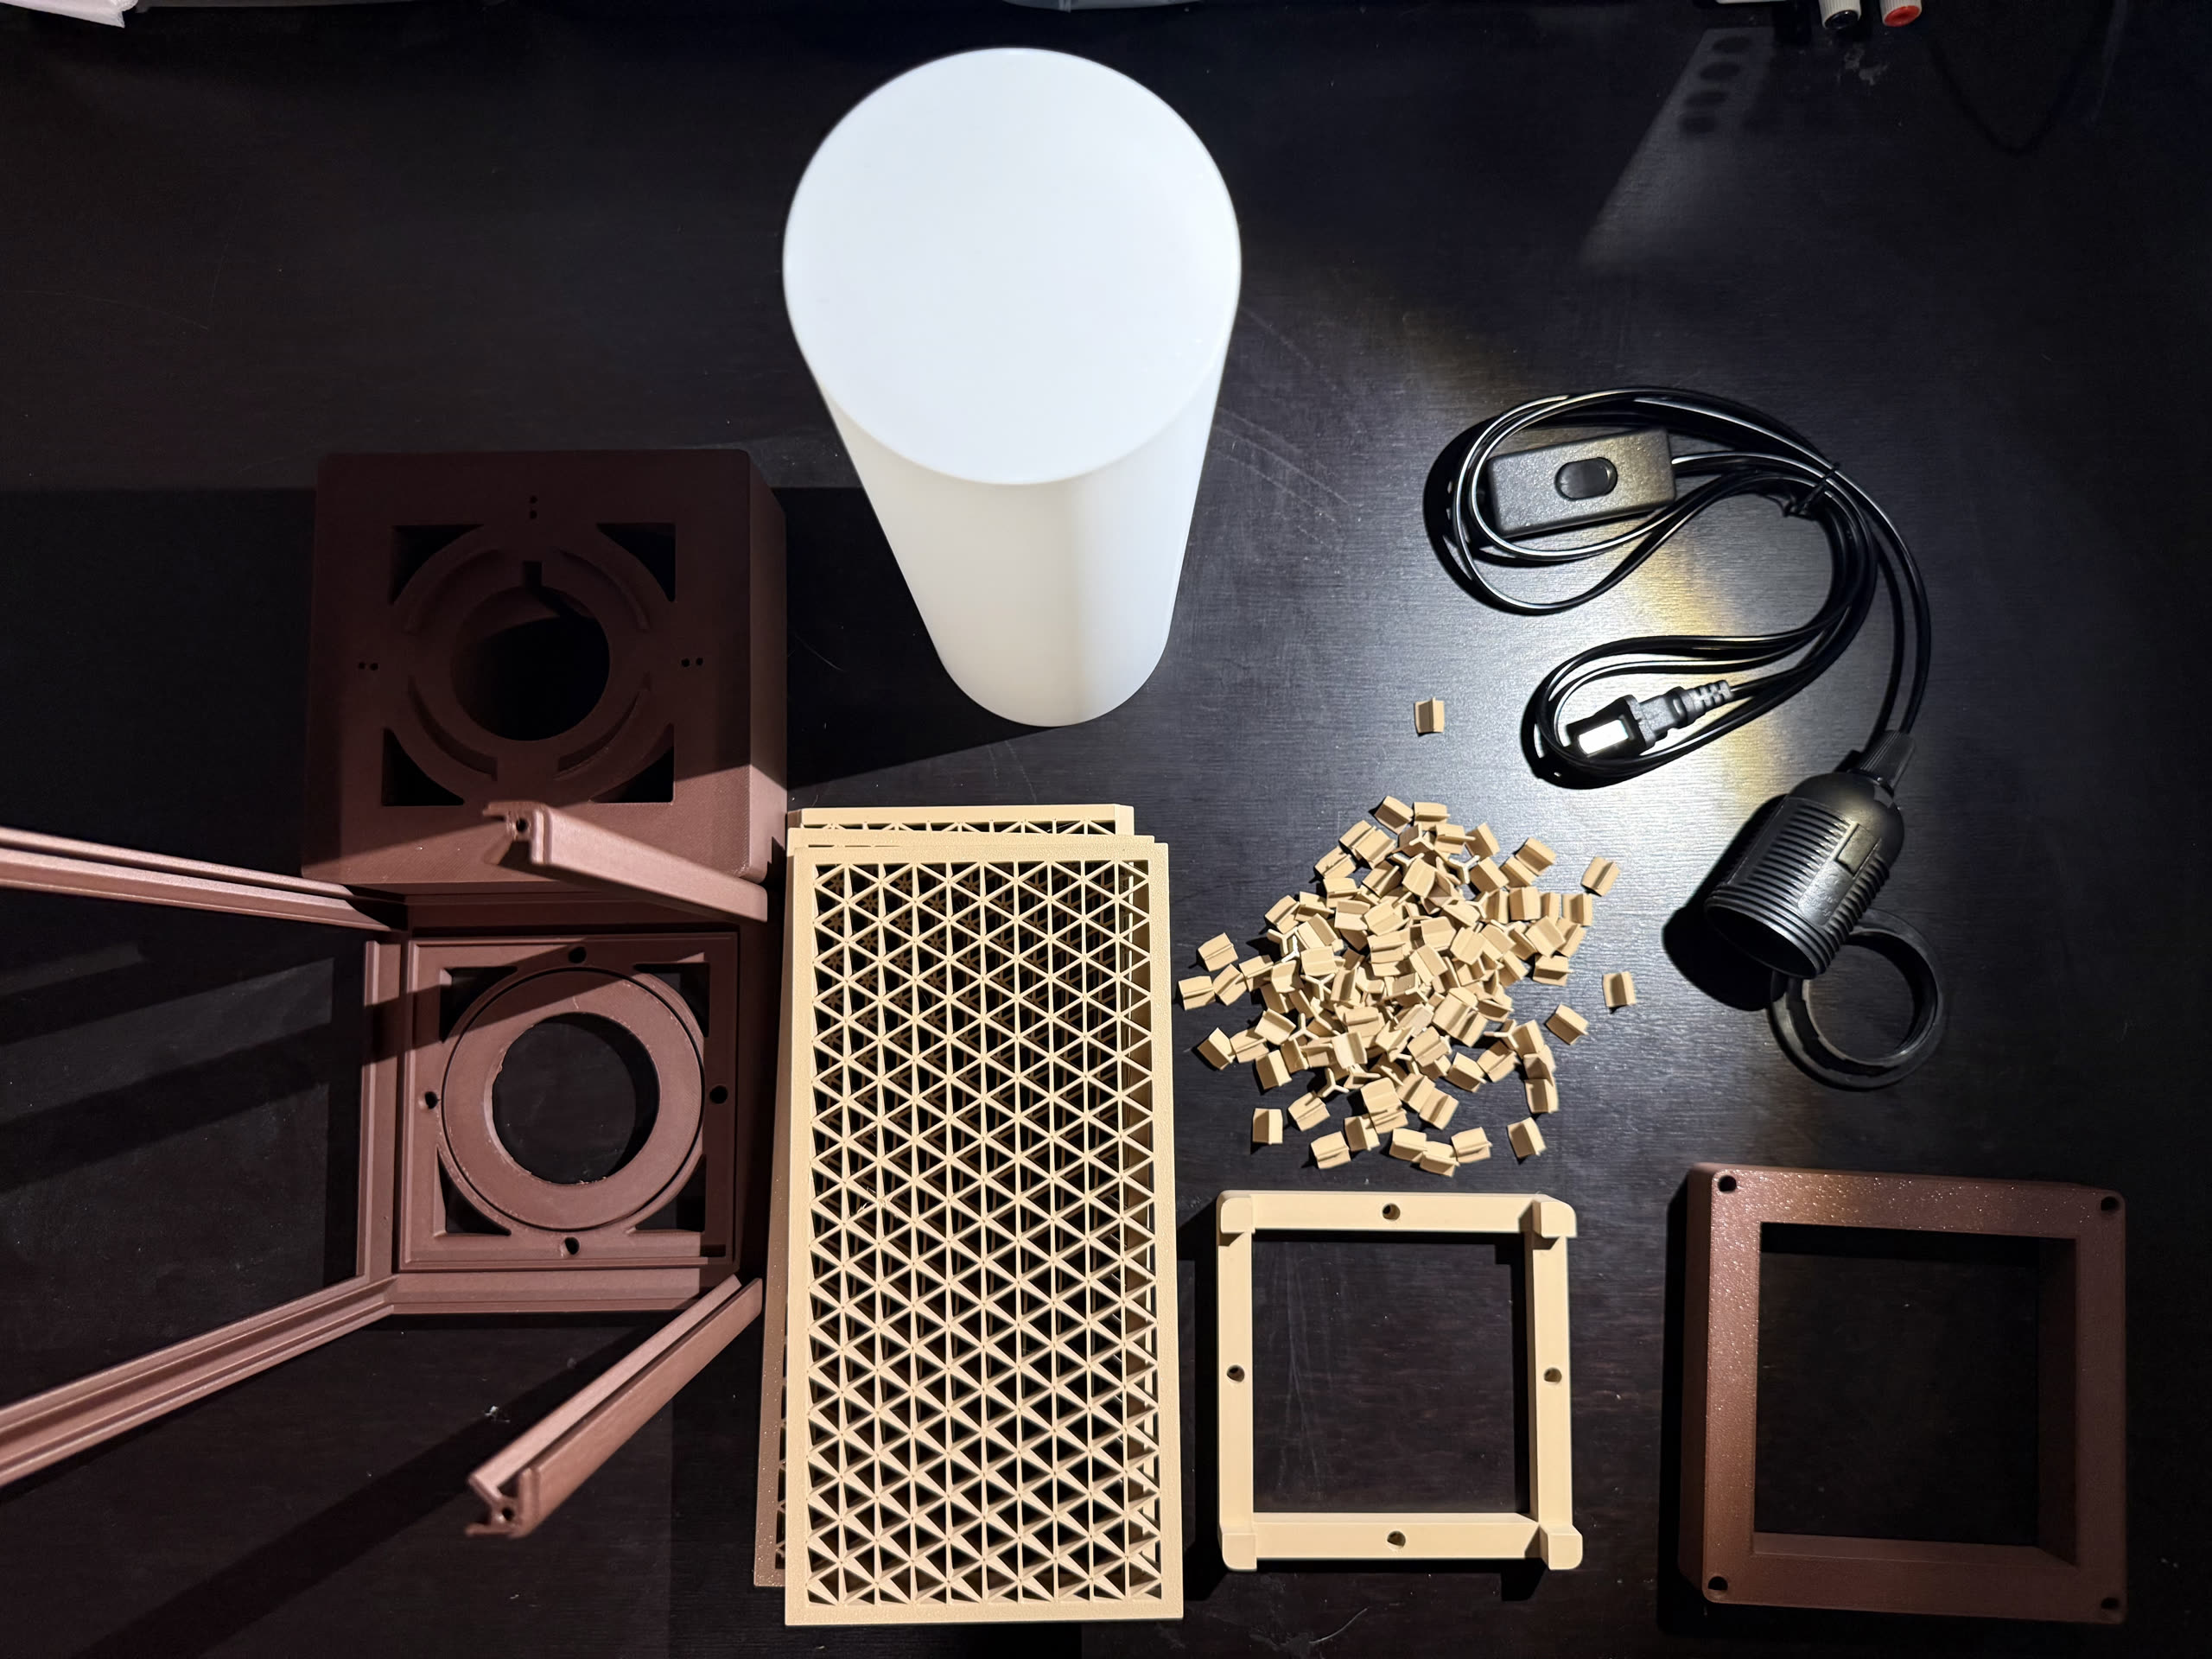
The Parts
*Ashanoa (the three pronged inserts) count is not accurate in photo
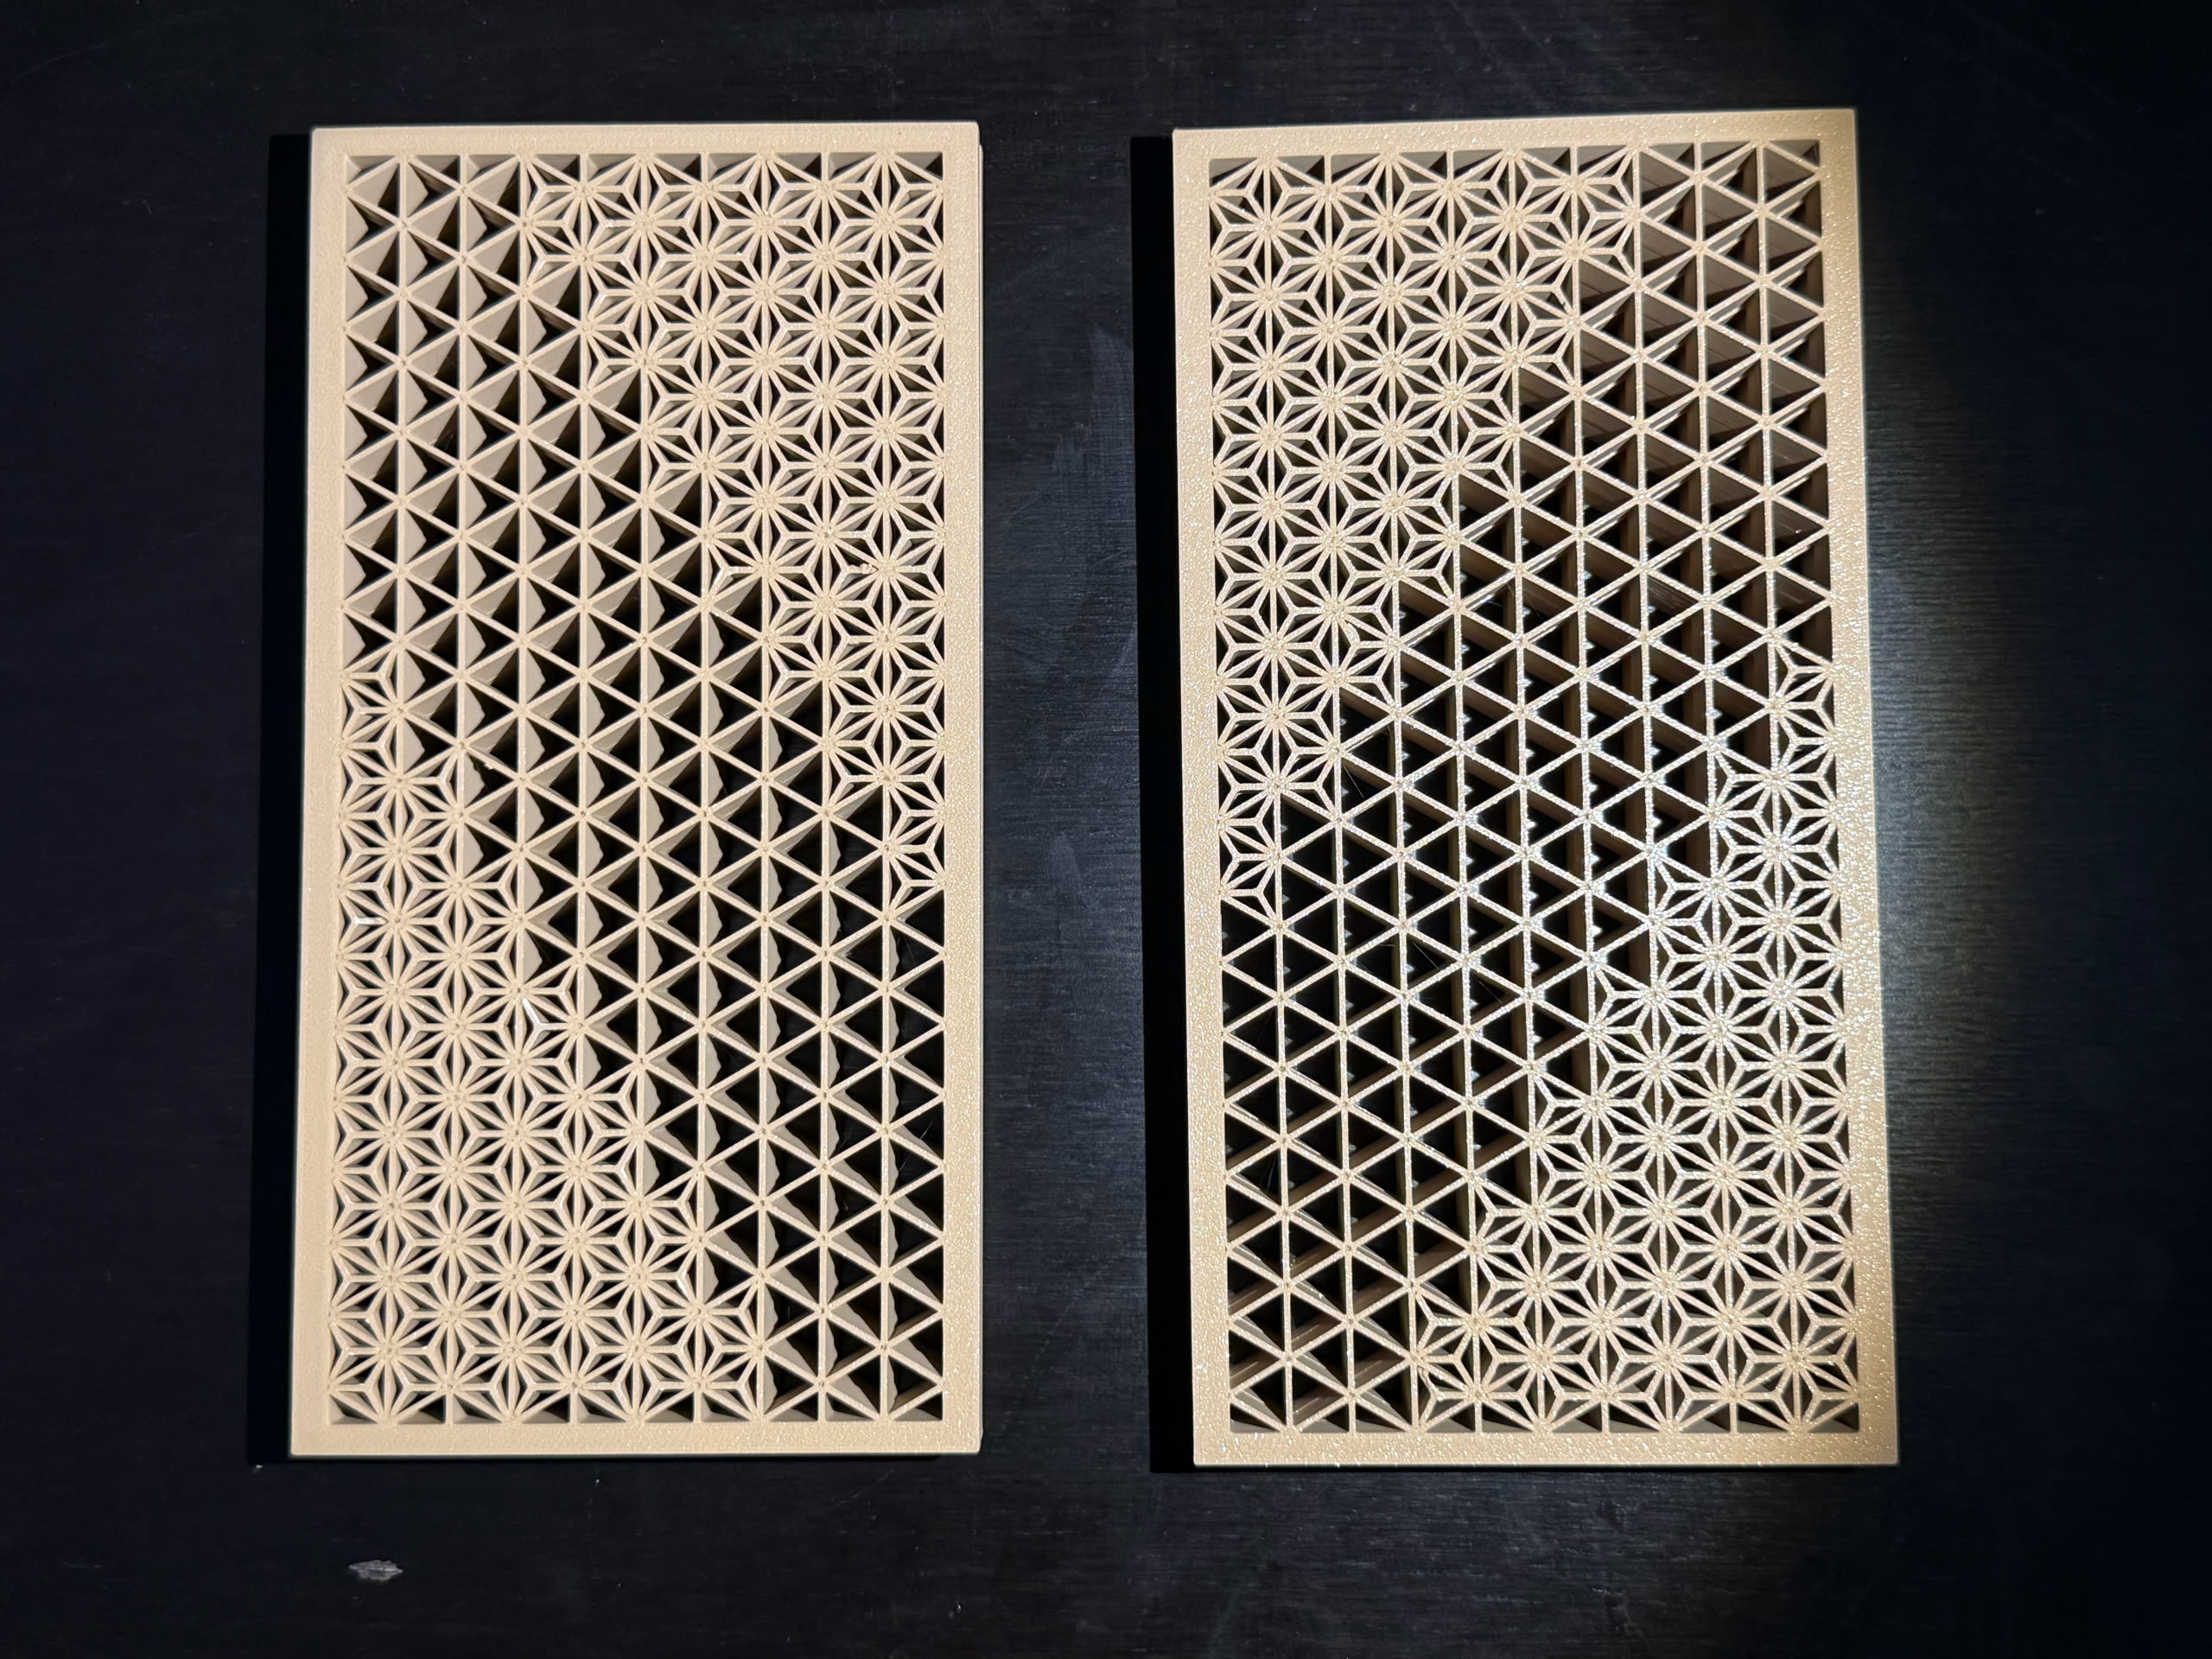
The Walls
You can basically design any pattern you want. There’s this website https://www.kumikodesigner.com/ that will generate patterns for you, but in my case, I'm just going to use the one that's already in the 3d print, as well as using the same angled design.
The amount of triangles that are in each wall are 35 (height) x 10 (length)
If you want to do the same angled pattern, either start on the 15th triangle down or the 21st up, and then go down in a staircase subtracting 3 triangles down each time in a staircase until you place 3 (or 7 across).
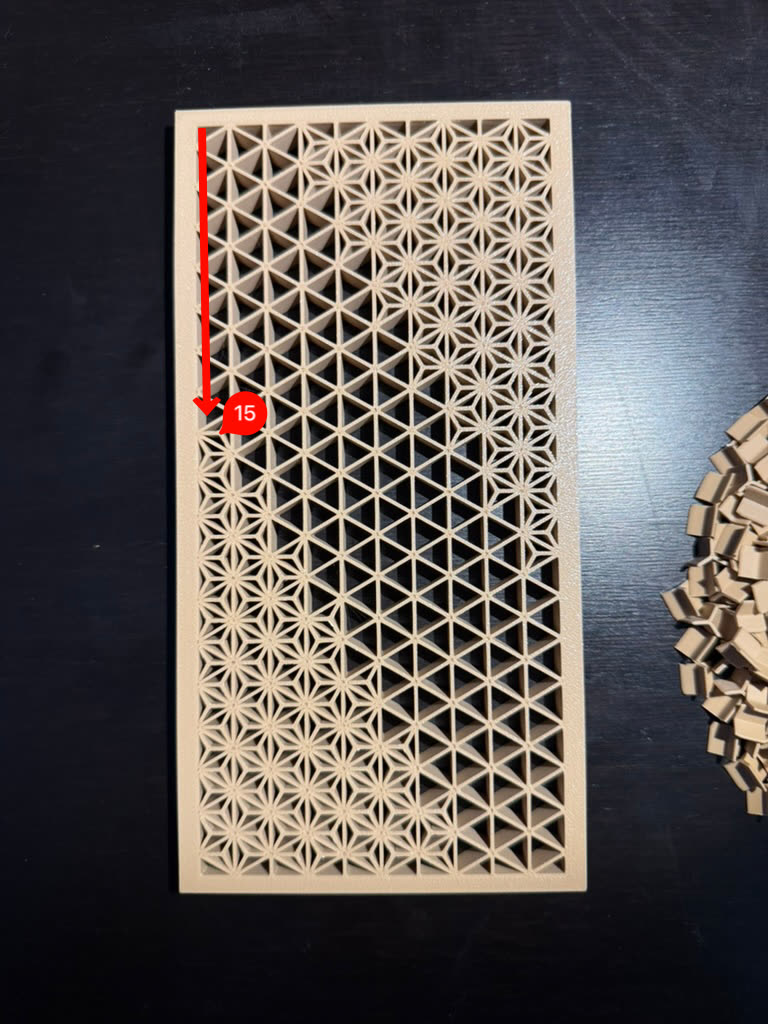
You will need 672 Ashanoas in total (84 for every diagonal)
I didn't count them I just did
>>> from functools import reduce
>>> reduce(lambda a,b: a + (b*3), range(1,8),0)
84

>>> _ * 2 * 4 # _ <- means to use last result, which in this case is 84
672
Because I am lazy. There is probably a more elegant way of figuring that out, but I'm only going to be doing that calculation once.
Once you have one wall panel complete, it's pretty easy to complete another one just by laying it on top of it and copying the layout.
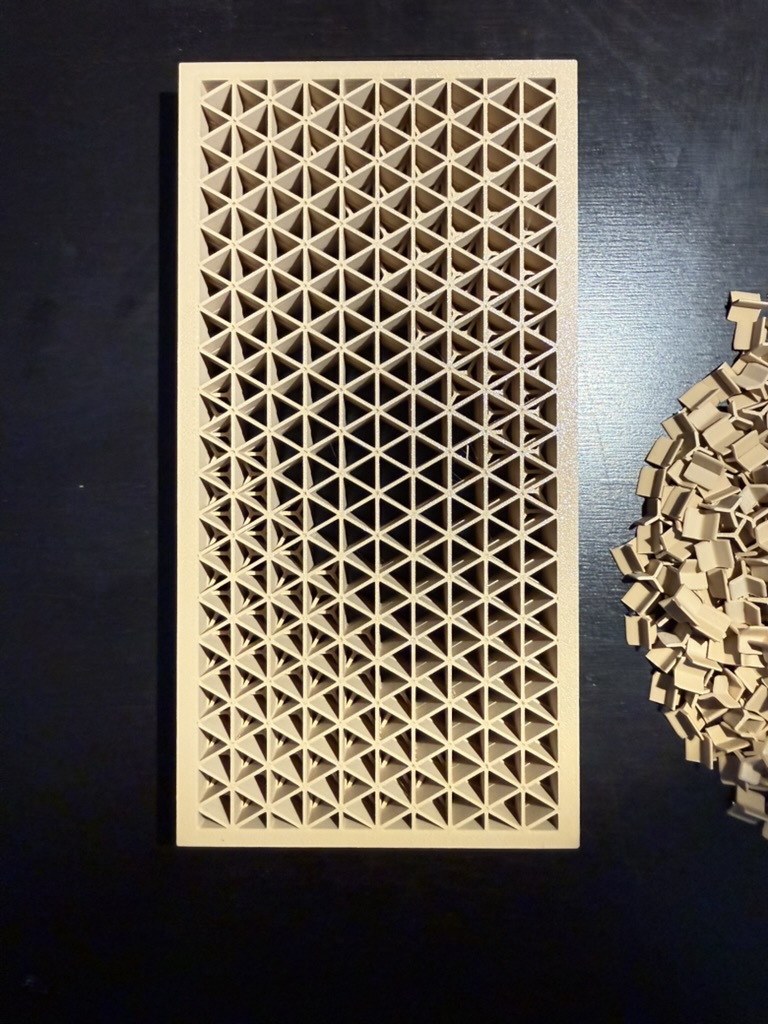
⚠️ Warning: Once you create two of an identical panel, you will need to create 2 more that have the diagonals on the opposite side. They will not be the same when rotated.
The Frame
The rest is pretty straightforward, so it will mostly just be pictures here.
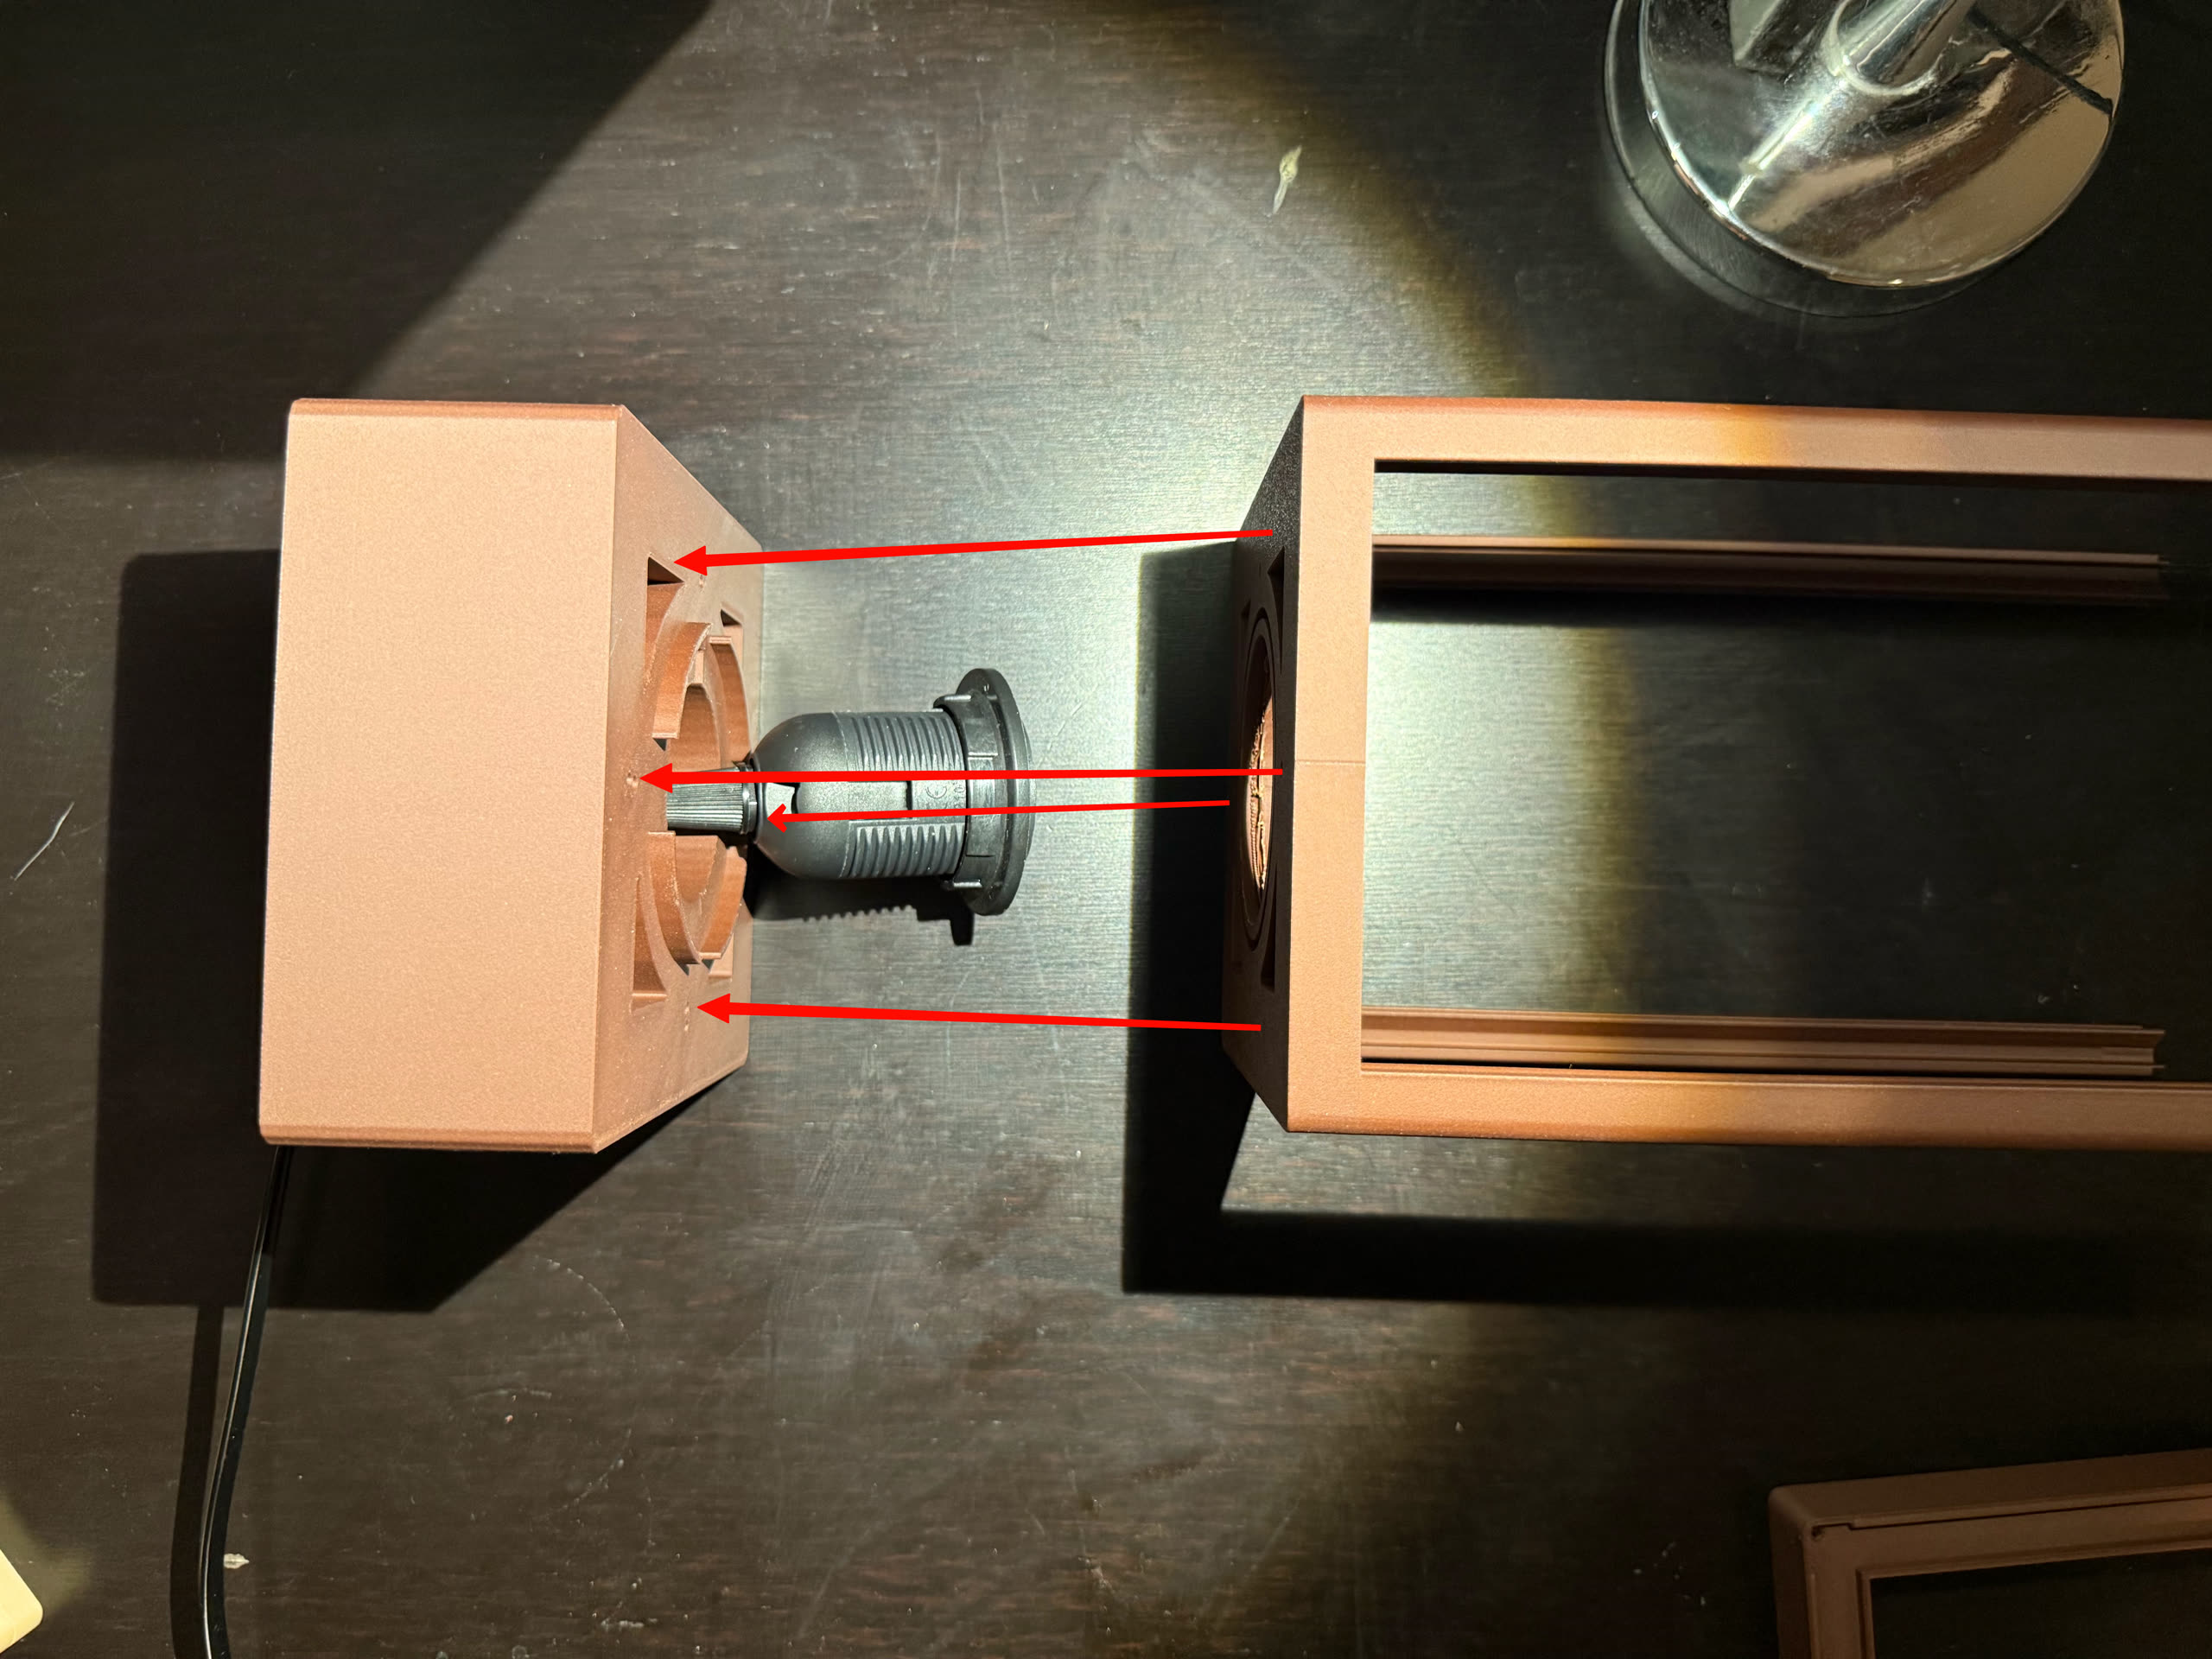 Put the socket in the large block, and make sure to screw on the overhang piece. Then connect four screws to the main frame from the top into the block.
Make sure when screwing in, that it becomes flush with the block. Might seem like it won't be able to, but eventually it will.
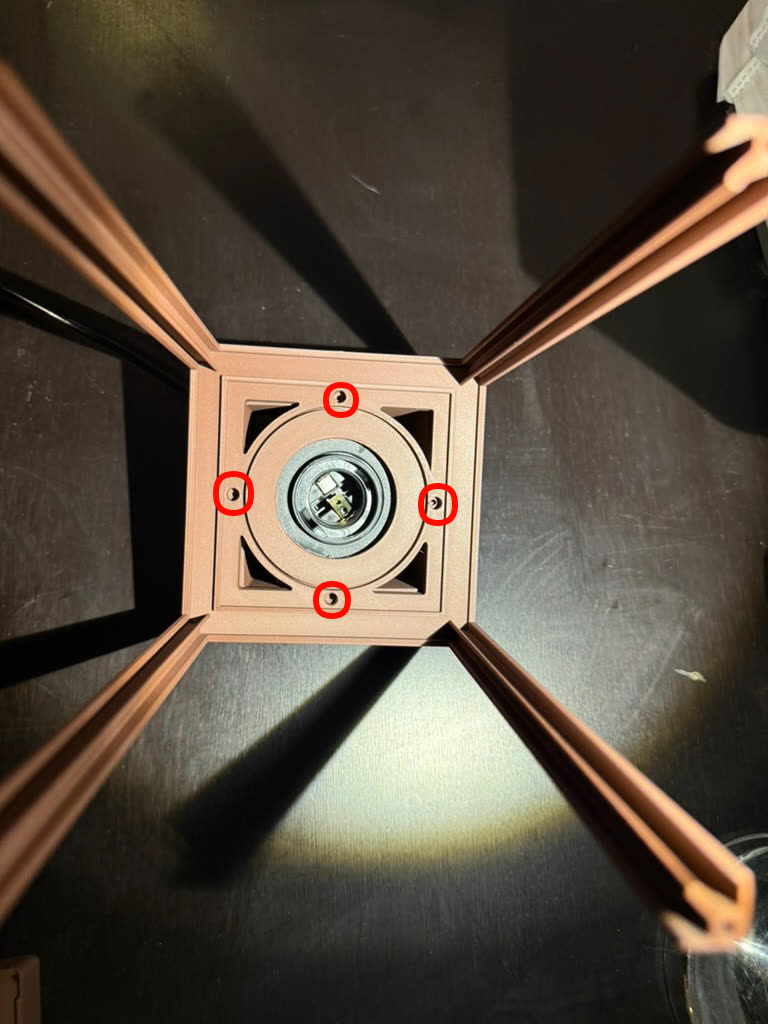
Once that is complete, I flip the lamp over and attach the stand.
There are four more screws to screw in here. same deal as before with making sure it is flush. I believe this is also where the four pegs go in as well, but I didn't want to do that here so I did not insert them. If only because I like the look of this better
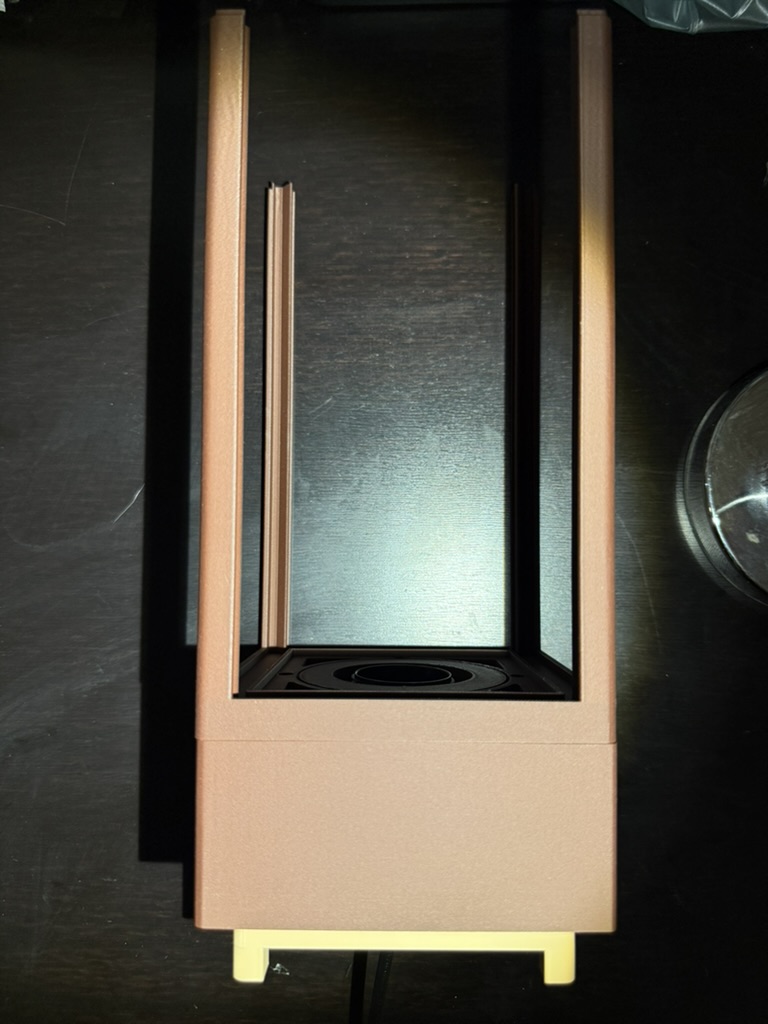
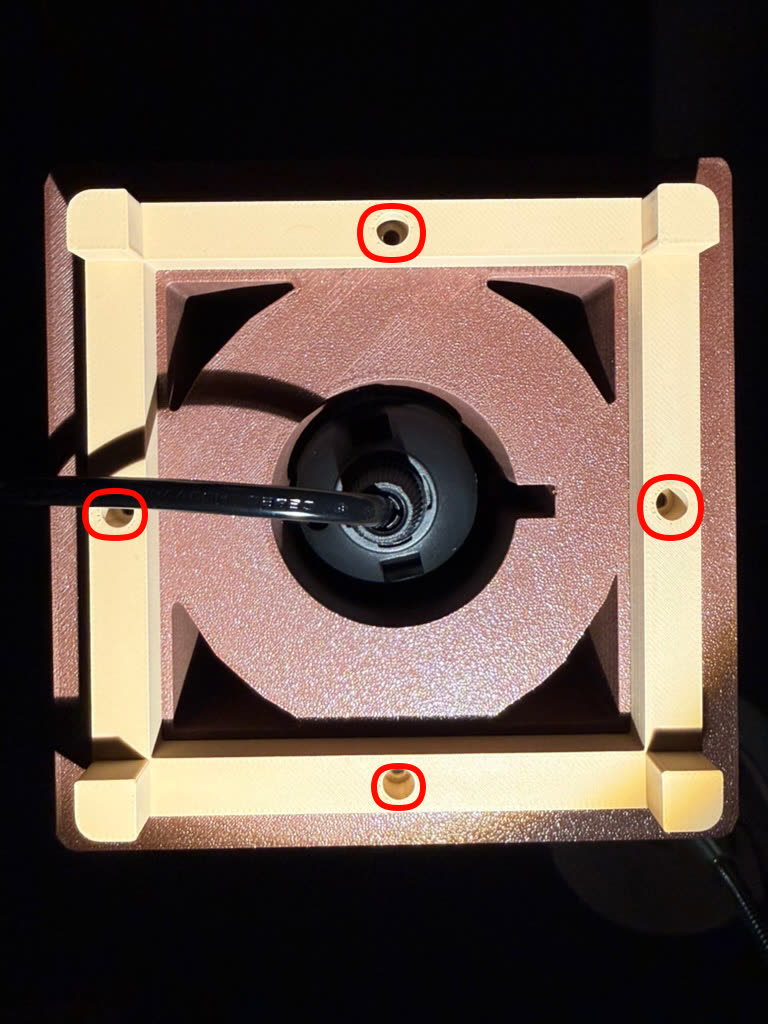
Once that is done, all that's really left is to put in the light bulb, the shade, and the walls in and screw the top.
As a note , the shade is just fit in loosely and can be taken out and put back really easily.

Screw in the four corners of the top (this might require a bit more work than the other ones), and tada!
You got yourself a pretty cool lamp
A picture of my cat for the road.